PNG, or Portable Network Graphics, is a format that’s been around since the mid-1990s. It was created as a replacement for the GIF format, with the aim of providing a patent-free, lossless image format. A standout feature of PNG is its support for alpha channel transparency, which allows for high-quality transparent backgrounds. This makes it ideal for graphics like logos and icons. Another key point is that PNG supports a wide range of colors, making it suitable for both grayscale and full-color images. One of the biggest advantages of PNG is its lossless compression, which means you can edit and save images without losing quality. However, this also means that PNG files tend to be larger, which can slow down website performance.
Key Features of WEBP
WebP is a newer image format developed by Google in 2010. It was designed to provide more efficient image compression without sacrificing quality. WebP supports both lossy and lossless compression, making it versatile for different needs. It also supports transparency like PNG, but with smaller file sizes. Additionally, WebP can handle animations, which PNG cannot. This makes it a great choice for web-based media. While WebP initially faced compatibility issues, it is now supported by major browsers like Chrome, Firefox, and Edge, which has boosted its adoption.
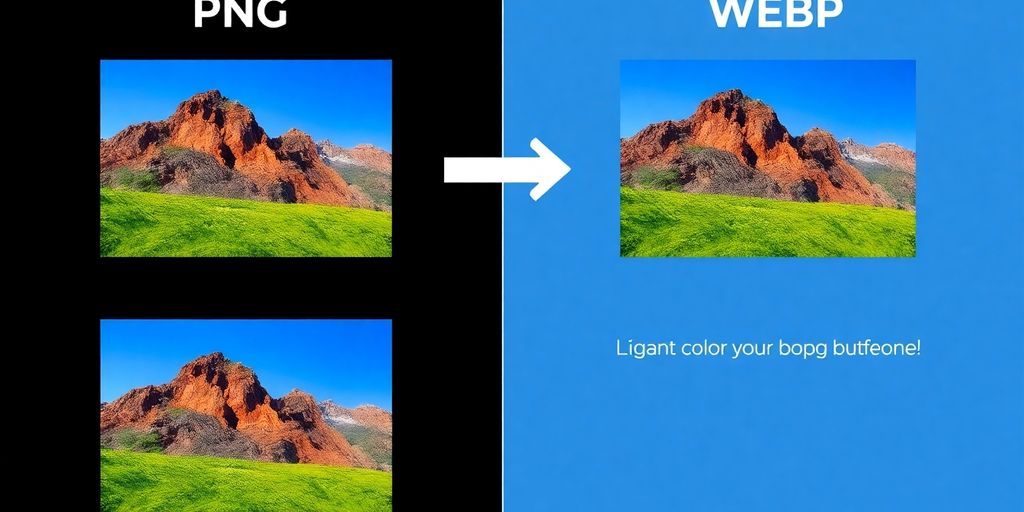
Comparing PNG and WEBP
When comparing PNG and WebP, several differences stand out:
Compression: WebP files are generally 23% smaller than PNG for the same image quality.
Transparency: Both formats support transparency, but WebP does so with smaller file sizes.
Animation: WebP supports animation, whereas PNG does not.
Browser Support: PNG is universally supported across all browsers, making it a reliable choice. WebP is supported by most modern browsers, but not all older ones.
Switching from PNG to WEBP has its perks. WEBP images are known for their impressive compression efficiency, which means smaller file sizes without losing much quality. This is super handy for speeding up your website. WEBP supports both lossy and lossless compression, giving you flexibility based on your needs. Plus, it handles transparency and animations, making it a versatile choice for web graphics. With WebP recommended for general web images, it's no wonder it's gaining traction.
Limitations of PNG
While PNG is great for high-quality images with transparency, it has its downsides. PNG files can be quite large, which might slow down your website. They also lack animation support, which can be a limitation for more dynamic web content. Moreover, PNG doesn't offer the same level of compression efficiency as WEBP, making it less ideal for optimizing web performance.
Use Cases for WEBP
WEBP shines in various scenarios. It's perfect for websites looking to improve load times without sacrificing image quality. E-commerce sites, media platforms, and personal blogs can all benefit from using WEBP. The format's ability to maintain quality at reduced file sizes makes it a smart choice for any online platform aiming for faster load times and a better user experience.
Choosing WEBP over PNG can lead to significant improvements in web performance and user satisfaction, especially in today's fast-paced digital environment.
Tools and Software for Converting PNG to WEBP
Converting images from PNG to WEBP format can be straightforward if you have the right tools. Let's explore some options that cater to different needs, whether you prefer online tools, desktop software, or command-line utilities.
Online Conversion Tools
Online converters are perfect for quick tasks without the hassle of installing software. Ezgif and XnConvert are popular choices, offering features like drag-and-drop, batch conversion, and even the ability to add watermarks or rotate images. These platforms are user-friendly and accessible from any device with an internet connection.
Ezgif: Known for its simplicity, it allows you to convert images easily while also offering basic editing tools.
XnConvert: A versatile tool that supports multiple formats and batch processing, making it ideal for larger tasks.
Cloudinary: Offers URL-based transformations that can convert images on the fly without coding skills.
Using online tools like Ezgif is convenient for small projects or when you're on the go, providing flexibility without compromising on quality.
Desktop Software Options
For those who need more control over the conversion process, desktop software can be a better fit. Programs like Photoshop allow for precise adjustments and high-quality output. However, they might require a steeper learning curve compared to online tools.
Photoshop: Offers comprehensive editing and conversion capabilities, though it might be overkill for simple conversions.
GIMP: An open-source alternative to Photoshop, providing similar functionality without the cost.
XnConvert: Also available as a desktop application, providing robust batch processing features.
Command-Line Tools
For tech-savvy users or those managing large volumes of images, command-line tools offer powerful solutions. Tools like cwebp are excellent for bulk conversions and automation, especially on platforms like Windows 11.
cwebp: A command-line tool from Google that supports batch conversion and is available for multiple operating systems.
ImageMagick: A versatile tool that can handle a variety of image formats and conversions through the command line.
FFmpeg: Known for video processing, it also supports image format conversions and can be scripted for automated tasks.
Command-line tools are great for those comfortable with scripting and looking to integrate image conversion into larger workflows.
Step-by-Step Guide to Converting PNG to WEBP
Converting PNG images to WEBP format can seem daunting, but with the right approach, it becomes a straightforward task. Here’s a step-by-step guide to help you navigate through the process.
Preparing Your Images
Before diving into the conversion, it’s essential to ensure your PNG images are ready for transformation. Start by organizing your files, checking their quality, and making necessary edits. You’ll want to ensure that the images are in their best form, as any flaws will carry over into the WEBP format. Consider using a photo editor to make adjustments to brightness, contrast, or cropping.
Choosing the Right Tool
Selecting the appropriate tool for conversion is crucial. There are various options available, from online converters to desktop software. If you’re looking for simplicity, online tools might be your best bet. However, for more control over the conversion settings, desktop software or command-line tools might be preferable. Tools like Paint on Windows 11 offer a quick way to convert multiple PNG files to WebP by simply saving them in the desired format.
Executing the Conversion
Once your images are prepared and you’ve selected your tool, it’s time to execute the conversion. Follow these general steps:
Upload your PNG files to the chosen tool.
Select the WEBP format from the available options.
Adjust any additional settings, such as compression level or image quality.
Initiate the conversion process.
Download the converted WEBP files and store them in a designated folder.
Converting images to WEBP not only reduces file size but also maintains quality, making it ideal for web use.
By following these steps, you can efficiently convert your PNG images to WEBP, optimizing them for better performance on the web. Remember, the key is to balance quality with file size to ensure the best results.
Optimizing WEBP Images for Quality and Performance
When it comes to web images, getting the right balance between quality and performance is key. Optimizing WEBP images means making sure they look good without slowing down your website.
Adjusting Compression Settings
Finding the right compression settings can be a bit of a balancing act. WEBP supports both lossy and lossless compression, so you have options. If you're looking for smaller file sizes, lossy compression is the way to go. But if you can't afford to lose any detail, stick with lossless. Tools like Croppy can help you tweak these settings easily.
Lossy Compression: Great for reducing file size drastically, but be careful with quality loss.
Lossless Compression: Keeps all the details, but the file size might be bigger.
Hybrid Approach: Mix both methods for different parts of the image to get the best of both worlds.
Ensuring Image Quality
Quality is everything when it comes to visuals. You want your images to pop on every device. Consider creating two versions of your images: one for regular displays and another for retina or high-DPI screens. This way, you ensure the best visual experience without sacrificing load time.
Balancing File Size and Quality
Balancing file size and quality is crucial. Smaller images load faster, but you don't want them to look pixelated.
Resolution: Resize images to fit their display size. No need to carry extra pixels.
Responsive Images: Use responsive design techniques to serve the right size image for each device.
Lazy Loading: Only load images when they are about to enter the viewport.
"Finding the sweet spot between image quality and performance is like cooking a perfect steak—it's all about timing and balance."
By following these steps, you can ensure your WEBP images are not just optimized but also enhance the overall user experience on your site. Remember, every byte saved counts towards a faster and smoother browsing experience.
Advanced Techniques for PNG to WEBP Conversion
Converting PNG to WEBP isn't just about a simple format switch; it involves some advanced techniques to get the best results. Let's dive into some of these methods.
Batch Conversion Methods
Handling a large number of images one by one can be tedious. Batch conversion is a lifesaver here. You can use command-line tools like cwebp to convert multiple PNG files to WEBP in one go. Here's a quick rundown on how to do it:
Install cwebp on your system.
Open your command-line interface.
Use a command like for file in *.png; do cwebp "$file" -o "${file%.png}.webp"; done to convert all PNG files in a directory to WEBP.
This approach saves time and ensures consistency across all your images.
Automating the Conversion Process
Automation can really streamline your workflow. You can set up scripts that automatically convert any new PNG files in a folder to WEBP. This is particularly useful for developers and designers who frequently update image assets.
Use tools like cron jobs on Unix-based systems to schedule regular conversion tasks.
Implement file-watching scripts that trigger conversion whenever a new PNG is added.
These automation techniques free you from manual interventions, letting you focus on other tasks.
Handling Transparency and Animation
One of the trickier aspects of converting PNG to WEBP is dealing with transparency and animation. WEBP supports both, but there are nuances:
For transparency, ensure your converter tool maintains the alpha channel. This is crucial for images like logos and icons.
When converting animated PNGs, use tools that support WEBP's animation capabilities. This might involve using specific software or plugins that can handle such tasks.
In advanced conversions, balancing quality and file size is key. Aim for settings that maintain visual integrity without bloating the file size. This ensures images load quickly on websites, enhancing user experience.
By mastering these advanced techniques, you can optimize your PNG to WEBP conversion process, ensuring high-quality, efficient results.
Common Challenges in PNG to WEBP Conversion
Dealing with Color Shifts
When converting images from PNG to WEBP, one of the most common issues is color shifts. This happens mainly due to the lossy nature of WEBP compression, which can alter the original colors of your image. To minimize these shifts, it's often best to use higher quality settings, particularly above 80%. This helps maintain the original color fidelity, especially in images with subtle gradients or complex color patterns.
Maintaining Transparency
Another hurdle in the conversion process is maintaining transparency, which is a key feature of PNG images. WEBP does support transparency, but ensuring it is preserved during conversion can be tricky. If not handled correctly, you might end up with unwanted artifacts or a loss of transparency in your images. It's crucial to use tools that support alpha transparency in WEBP to keep your images looking clean and professional.
Ensuring Browser Compatibility
Not all browsers fully support WEBP, which can be a significant issue when you're trying to ensure your images display correctly for all users. While most modern browsers have adopted WEBP, there are still some that do not. To tackle this, you might need to use fallback solutions. This often involves using HTML and CSS techniques to provide alternative formats like JPEG or PNG for browsers that don’t support WEBP.
Converting images isn't just about changing formats; it's about preserving quality and functionality across different platforms and devices. Keep in mind the specific needs of your audience and the capabilities of their browsers.
Best Practices for Using WEBP on Websites
When using the WEBP format on websites, it's essential to implement responsive images. This means your images should adapt to different screen sizes and resolutions. Creating multiple versions of your images can help achieve this. For instance, you can have one version for standard displays and another optimized for retina or high-DPI screens. This ensures that your images look sharp and clear on any device.
Utilizing Lazy Loading
Lazy loading is a technique that delays the loading of images until they are needed. This can significantly improve page load times, especially for image-heavy websites. By implementing lazy loading, you ensure that your website remains fast and efficient, loading only the images that are currently visible on the user's screen.
Leveraging Content Delivery Networks
A Content Delivery Network (CDN) can distribute your WEBP images across multiple servers worldwide. This reduces the distance between the user and the server, leading to faster load times. Using a CDN for your images can also help in balancing the load during high traffic periods, ensuring a smooth user experience.
Remember, optimizing your images for the web is not just about reducing file size, but also about maintaining a balance between quality and performance.
Incorporating these practices can significantly enhance the performance of your website. The WEBP format, with its capabilities such as optimized color depth for lossy conversion, is well-suited for modern web design, making it a valuable asset in your web development toolkit.
SEO Benefits of Using WEBP Images
Improving Page Load Times
When it comes to SEO, speed is key. Fast-loading pages are essential for good search engine rankings. WebP images, thanks to their efficient compression, can significantly reduce file sizes compared to other formats like PNG or JPEG. This reduction in size means quicker load times, which directly impacts how search engines view your site. A faster website not only pleases visitors but also search engines, which can lead to better rankings.
Enhancing User Experience
A smooth user experience is crucial for keeping visitors on your site. With WebP images, you can offer high-quality visuals without the heavy load times. Users appreciate sites that load quickly and smoothly, and WebP helps achieve this by balancing image quality with file size. This balance ensures that users are not left waiting for images to load, which can reduce bounce rates and keep visitors engaged.
Boosting Search Engine Rankings
Search engines like Google factor in page speed as part of their ranking algorithms. By using WebP images, you not only improve load times but also enhance the overall user experience, both of which are important metrics for search engines. Optimized images mean faster pages, and faster pages can lead to higher rankings. As a result, your site becomes more visible to potential visitors, increasing traffic and engagement.
WebP images aren't just about saving space—they're about creating a smoother, faster, and more engaging experience for your audience. By integrating WebP into your website, you're investing in a future-proof solution that aligns with modern SEO practices.
Case Studies: Successful PNG to WEBP Conversions
E-commerce Websites
In the fast-paced world of e-commerce, image load times can make or break a sale. By converting PNG images to WEBP, online retailers have seen a noticeable improvement in page load speeds. This speed boost not only enhances the user experience but also increases conversion rates. For instance, a popular fashion retailer switched to WEBP and reported a 20% increase in page speed, which directly correlated with a 15% boost in sales.
Challenge: Large PNG images slowing down the site.
Solution: Conversion to WEBP for faster loading.
Outcome: Improved user engagement and higher sales.
Media and Publishing Platforms
Media sites often juggle thousands of images. By adopting WEBP, these platforms have managed to reduce their bandwidth usage significantly. A leading news website transitioned their entire image library from PNG to WEBP, resulting in a 30% reduction in data transfer. This not only cut costs but also improved site performance, particularly on mobile devices.
Challenge: High bandwidth costs due to image-heavy content.
Solution: Batch conversion to WEBP format.
Outcome: Lowered operational costs and enhanced mobile user experience.
Personal Blogs and Portfolios
Bloggers and creatives often use images to tell stories or showcase their work. By shifting from PNG to WEBP, personal websites have achieved quicker load times without sacrificing image quality. One travel blogger noted that after converting images to WEBP, their site loaded twice as fast, which decreased bounce rates and increased time spent on the site by 40%.
"Switching to WEBP has been a game-changer for my blog. My readers enjoy a smoother experience, and I’ve seen a noticeable uptick in engagement."
Solution: Use of WEBP for efficient image delivery.
Outcome: Enhanced reader engagement and reduced bounce rates.
These case studies illustrate how adopting WEBP can transform digital experiences across various platforms. Whether it's boosting sales, cutting costs, or engaging readers, WEBP proves to be a powerful tool in the digital realm.
Future Trends in Image Formats and Conversion
Emerging Image Formats
In the world of digital images, staying ahead of the curve is crucial. New formats are popping up, promising better compression and quality. AVIF is one of those formats that's making waves, offering even smaller file sizes than WebP with impressive image quality. It's worth keeping an eye on as it might soon become the go-to choice for web developers.
Technological Advancements
The tech behind image conversion is evolving rapidly. Machine learning is now being used to enhance image quality during conversion, making the process more efficient. This means that converting a PNG to WEBP could soon be as simple as a few clicks, with algorithms doing the heavy lifting to maintain quality.
Predictions for WEBP Adoption
WEBP is already widely used, but its adoption is expected to grow even more. As website status checkers continue to emphasize performance and speed, WEBP's efficiency will make it a staple in web design. With major browsers supporting WEBP, it's likely to become a standard format for online images.
As we look ahead, the world of image formats and conversion is evolving rapidly. New technologies are emerging that promise to enhance how we store and share images. Stay ahead of the curve and explore these exciting developments on our website!
Frequently Asked Questions
What is a PNG file?
A PNG file is a type of image format known for its high quality and ability to support transparent backgrounds. It's often used for graphics that need to maintain clarity and detail.
What is a WEBP file?
WEBP is an image format developed by Google that offers both lossy and lossless compression. It allows for smaller file sizes without losing quality, making it great for web use.
Why should I convert PNG to WEBP?
Converting PNG to WEBP can reduce file sizes, leading to faster website loading times. This is important for improving user experience and search engine rankings.
Are there any downsides to using WEBP?
The main downside is that not all web browsers and image editors support WEBP. However, most modern browsers do, and there are workarounds for compatibility issues.
How can I convert PNG images to WEBP?
You can use online tools, software, or command-line programs to convert PNG images to WEBP. Many options offer easy-to-follow instructions.
Does converting to WEBP affect image quality?
WEBP is designed to maintain image quality while reducing file size. However, using very high compression settings might slightly affect quality.
Can WEBP files have transparent backgrounds?
Yes, WEBP supports transparent backgrounds, similar to PNG, which makes it suitable for images like logos and icons.
Is WEBP better than PNG for all uses?
Not necessarily. While WEBP is great for web images due to its smaller size, PNG might be better for print graphics or when universal compatibility is needed.